Friday, November 22, 2013

Great Dane Size Coat!

If you have a big dog, you KNOW how hard it is to find things to fit them. Your selection is typically very limited and pretty expensive. Well, I am cheap, and I prefer to make things myself whenever possible, so with the help of a Russian speaking friend and Google Translate, I came up with this jacket pattern for my 9 month old Dane pup, Fergus. Let me state now for the record, this is NOT my pattern. I didn't create it in any way. A friend found it for me, and she helped me translate it to English, so my contribution here is to let you skip all the translation business. The pattern is on a Russian forum, and she starts here with images and instructions. The images for the pattern pieces (which you will need to draw out for yourself using measurements) are found on page 5. I used freezer paper and a quilting ruler. The freezer paper is the perfect width, and once cut out you can iron it onto the fabric for cutting. Just make sure you have a large area to roll it out- somewhere your dog can't "help" is a bonus.

This is pattern piece for the main body of the coat. (From the previous link.)
Measurements are as follows, in inches:
A- 7.5
B-33.5 (on fold)
C-47
D-4
O-8
N-18
P-2.5
M-17.5
K-15.75
J-12.5

This is the pattern piece for the closure part of the coat. 
Again, measurements are as follows, in inches:
A-27.5 (on fold)
B-3.5
C-21.25
D-12.5 (I cut this at 6" when making the coat for a male, otherwise it will be in the way, and he will pee on it.)
K-8.5
L-12

These measurements are for an adult size Dane. Ferg was about 32" tall and weighing 120 lbs when I made my practice coat out of scraps, and it fit him a bit huge. 
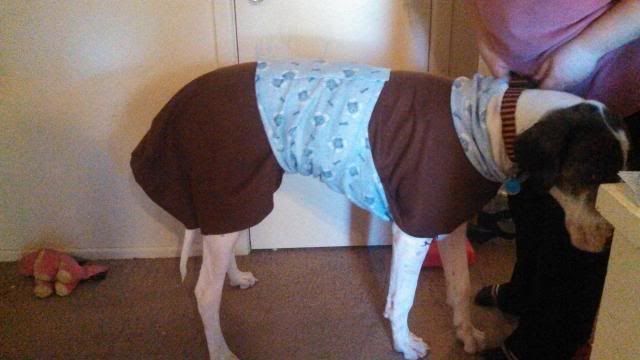
You can see how it hangs off his butt here. For this one I forgot to cut down the width of the belly strap, so it's in the way too, and the neck is a bit too large, so it kept slipping back. You'll have to adjust according to your dog's size, but I believe the instructions for that are in the original forum post I linked above. 

When making Ferg's official coat, I cut down the measurements (a bit too much- oops!) to make it more puppy friendly. I also cut off the portion that would totally cover his butt, and now I wish I hadn't, because the coat slips around and won't stay up as well. It will do for now, but when I make a big boy size, I'll stick to the original design with the boy modifications. 


Anyway. Once you have your pattern drawn out, cut out the fabric. For the good coat (the black and blue version) I used black Kona cotton on the outside and lined it with red fleece. I stuck them together with basting spray, then sewed the stripes down the back to keep everything in place. I used cutesy decorative stitches, and it took forever for each row. Bad idea. I suggest if you are doing it the same way I did, stick the fabrics together before cutting them out. Next time I will probably be lazy and use quilted fabric. You could even scope out thrift stores for old quilts if you wanted. Cut out the 2 main pieces. Next you'll want to measure the neck portion. To do this, I held it straight with my hands just to get an estimate for the collar portion. The original instructions suggest 20" by 7". When all your pieces are cut, you're ready to assemble the coat. For the main body, sew the sides marked "A" together. You can attach your collar before or after this step. I am lazy, so I did it before, which was easiest for me. 

IF you are using bias tape to finish the edges, I discovered on the black/blue version that it works much better to bind the edges of the belly piece before sewing it to the body of the coat. I bound everything but side "B" then joined together. Line up the center of side B with the seam on the front of the coat, right sides together, then sew. There are 2 small seams you'll sew on the back end of the coat, then you can finish with bias tape around all the edges. On my practice run I used all fleece and it went together much quicker- no need to finish fleece edges, so I just sewed everything together and left it as is. To fasten the belly piece, I sewed on velcro, but you could easily do snaps or buttons if you prefer. I thought velcro would be best for a still growing puppy. You're done! Sorry for the lack of pictures- I did not originally intend for this to be a blog post, so I just put the coat together in a hurry and without my camera! Feel free to contact me with any questions, and if needed I can try to add in some more pics. 

Thursday, August 29, 2013

Peanut Butter Protein Balls Recipe

I found this recipe a couple years ago on a message board and tried it out. Turns out my family LOVES these things. They are healthy and delicious, and I am always misplacing this recipe, so I'm posting it here! Surely I can remember that, right? Anyway, give these a try. You can mix them up in less time than it takes to preheat the oven! They're tasty with a big glass of milk. 

Protein Peanut Butter Balls Recipe:

2 scoops chocolate or vanilla whey protein powder

1/4 cup honey
3/4 cup raw oats
1 cup peanut butter
Protein Peanut Butter Balls Directions:Mix all these ingredients in a large bowl.Powder your hands with some flour (to prevent stickiness).Form into small 1″ balls and place on a bake sheet.Place in oven at 375 degrees for 5-10 minutes.
Store remainder in a Tupperware container in the fridge.


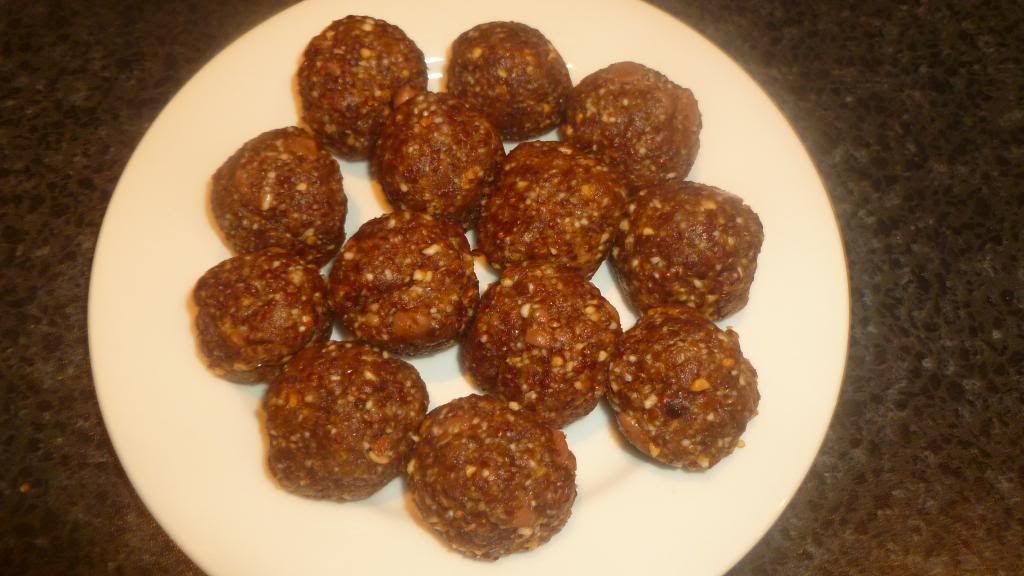
Note: This picture is not mine, and it is not of this recipe. It's a generic pic I found on photobucket.

Sunday, June 9, 2013

The pee pee tent pattern is here!

I know I mentioned sharing a pattern for the peepee tents I was making awhile back (like six years ago, when I last blogged...*sigh*) and I FINALLY got around to writing it out and having somebody test it for me. So here it is!

Edit: The idea behind these is to have something cover a baby boy's parts during a diaper change, to keep him from peeing on himself or the lucky diaper changer.


Worsted weight yarn
5 mm (H) hook

Ch 1 at the beginning of each round does NOT count as a stitch.

Make a magic ring and secure with ch 1
Round 1: 6 hdc in ring. Join to first hdc.  6 hdc
Round 2: ch 1, hdc in same st. 2 hdc in next. Repeat around, join. 9 hdc
Round 3: ch 1, hdc in each st. Join. 9 hdc
Round 4: ch 1, hdc in same st. hdc in next st, 2 hdc in next st. (hdc, hdc, 2hdc) repeat around, join. 12 hdc
Round 5: ch 1, hdc in same st. 2 hdc in next st, repeat around, join. 18 hdc
Round 6: ch1, hdc in next st, hdc in next 4 st, then 2 hdc in next st. hdc in next 5, 2 hdc in next st. repeat around, join. 21 hdc.
Round 7: ch 1, hdc in next st, hdc in next 5 st, then 2 hdc in next st. hdc in next 6, 2 hdc in next st. repeat around, join. 24 hdc.
Round 8: Ch 1, hdc in each st around. Join. 24 hdc.
Round 9: Ch 1, hdc in next st, hdc in next 6 st, then 2 hdc in next st. hdc in next 7, 2 hdc in next st. repeat around, join. 27 hdc.
Finish off. Weave in ends.

You can sell things you make from this pattern, but please include a link to my blog in the listing! If you share the pattern, please share it as a link, do not copy the text.

Tuesday, February 26, 2013

A long winded update.

A friend posted a link to her "mommy blog" this morning, and after reading hers, I realize that my blog is much neglected- probably because there are days when I can barely remember my name, and I tend to forget that I even have a blog. Oops. I'm still with the crochet thing (coming up on a solid year of ONE hobby! Hooray for my attention span!) but I just can't do the hats any more. I guess I made so many last year that I burned myself out, and now I don't even really want to look at hats. I've been super busy (as far as crafty stuff goes) since Christmas, and I wanted to share a few of my finished goods.

Drop in the Pond lap size afghan. Pattern found here.


Monster High hat. 


My Christmas wreath.


Crochet cowboy set.


Potholders for the swap.
Showing the other sides of the reversible ones.


Celine swaddle set made for a baby gift.


A fuzzy beard hat made for a gift. I foresee requests for more of these in my future.


Some "pee-pee teepees" made from my own pattern. Hopefully I can get it written up to make sense and posted soon.


That's all of my finished goods. I'm currently working on a hexagon swap, a scrap blanket made from 4 round granny squares, a sunflower lap blanket, and I have been dyeing LOTS of yarn. 

My four year old diva so sweetly informed me that she NEEDS me to make her a crochet blanket for her new big girl bed, so I guess I will be adding a twin size to my "to do" list as soon as I take her to pick out colors of yarn.

I want to write up a post about yarn dyeing. I thought about including it here, but I have done so much lately, it would make this post days long, so I'll save it. If I remember to take more pics next time I "paint" yarn, I'll even post a tutorial for how I do things. 


Just a sneak peek of some that I've dyed.

Thursday, July 12, 2012

My newest hobby

Shame on me- I am officially a bad blogger. I can't believe it's been so long since I posted last! I get busy making new things and time just kind of slips away, then whoops, three months have passed by and I've not written a single post. But anyway. I didn't sign on today to ramble on about my lack of posts. Instead, I wanted to ramble on about my newest hobby: crochet. I looooooooooooove it. A friend suggested a Facebook crochet group to me, so I joined. Then I joined the group's 12" square swap to make 55 squares. I've been crocheting like mad, and thus far have 54 1/2 squares done. Now I have to figure out how to ship all those to San Diego!


My very most favorite things to make are hats. I've made an assortment of hats for a friend, her husband, and their three boys, and several for my daughter as well. So today I wanted to post up some pictures of what I've been doing the past three months.

 My little fashionista has to have hats!

Zombie!

 Dinosaur

 For the baseball fan in your life.
 My version of a Teenage Mutant Ninja Turtle- Leonardo
 Monster!
 Cotton bowls

A chunky hat and scarf set. 


I have made several other hats, but I seem to have misplaced the pictures. Imagine that!

Wednesday, April 4, 2012

Fabric Postcards

LOTS of pics in this post!!!

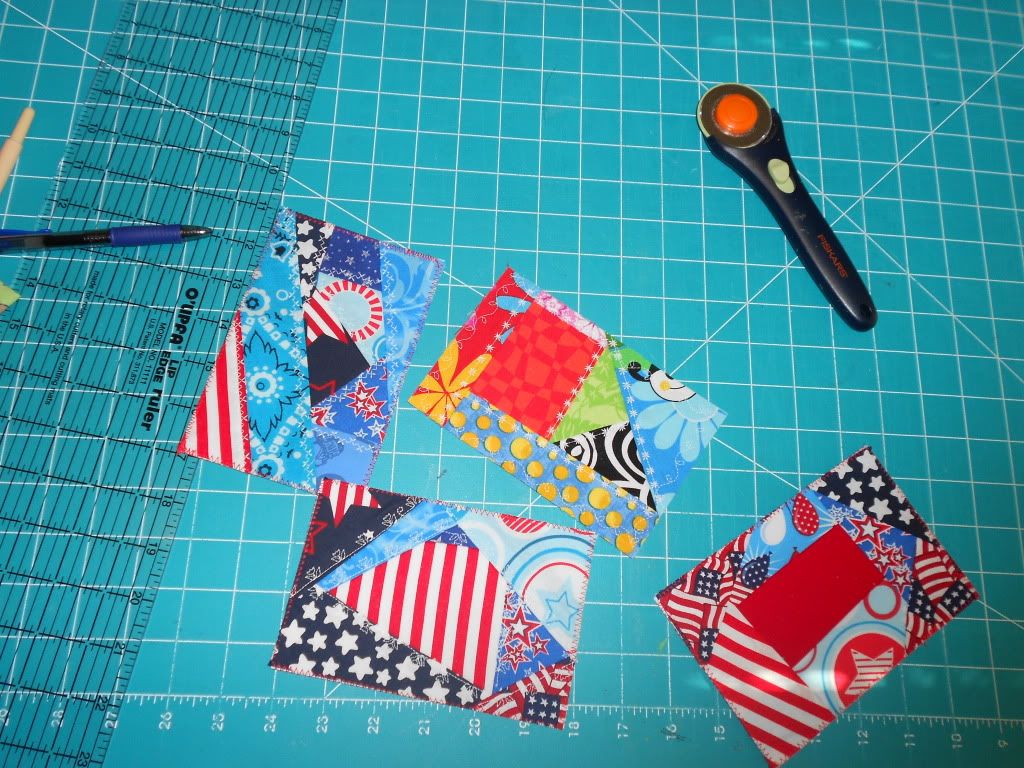
I am in the process of making these fabric postcards for a card exchange and for my adopted soldiers and marines. I've had a few people ask me how I made these. I finally remembered to take pics today so I could write a how-to. Yay! These are all for an Independence Day card exchange, but (surprise, surprise!) I got bored with sewing the same old red, white, and blue fabrics over and over.


First off, I should say I stumbled upon this blog post from Sunshower Quilts and this one from Deb Richardson about making fabric postcards, and just played with a bit to make it to my liking. I've already made about 30 of these things, and I'm only about half finished, so lots of things have changed from the first one to the ones I made today.

Here's what you'll need:
stiff stabilizer- I used Peltex, because that's what my fabric store had
Wonder Under or other fusible web
scrap fabric
fabric for backing- solid colors!!!
rotary cutter/mat/ruler
iron/ironing board
sewing machine
scissors

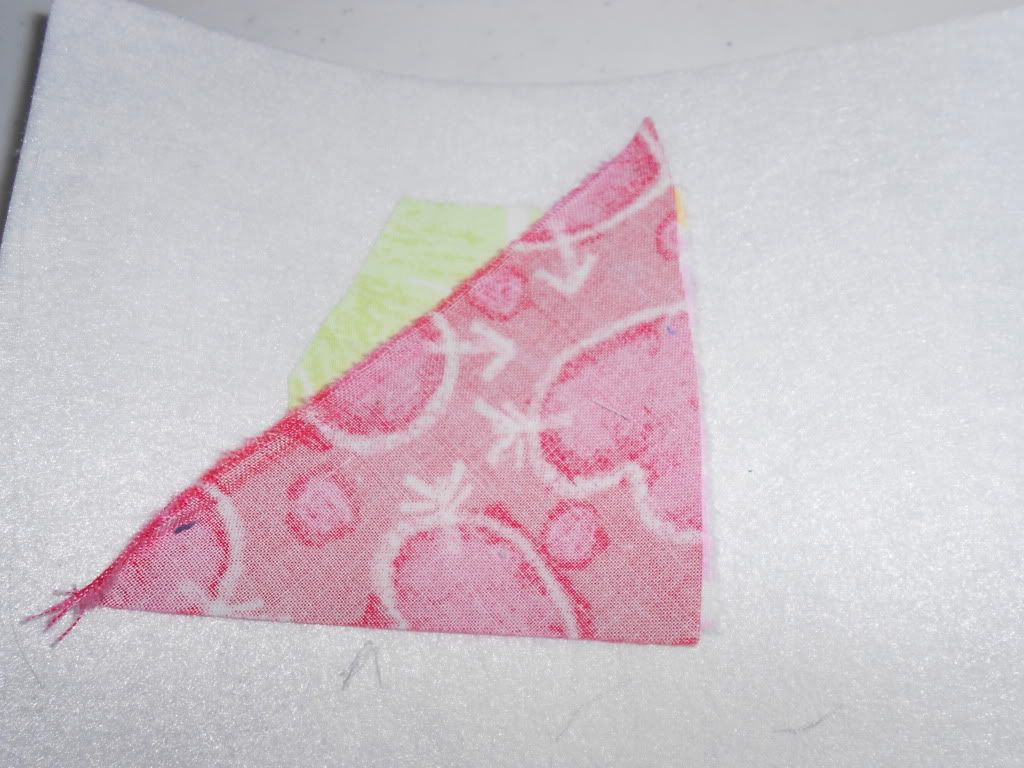
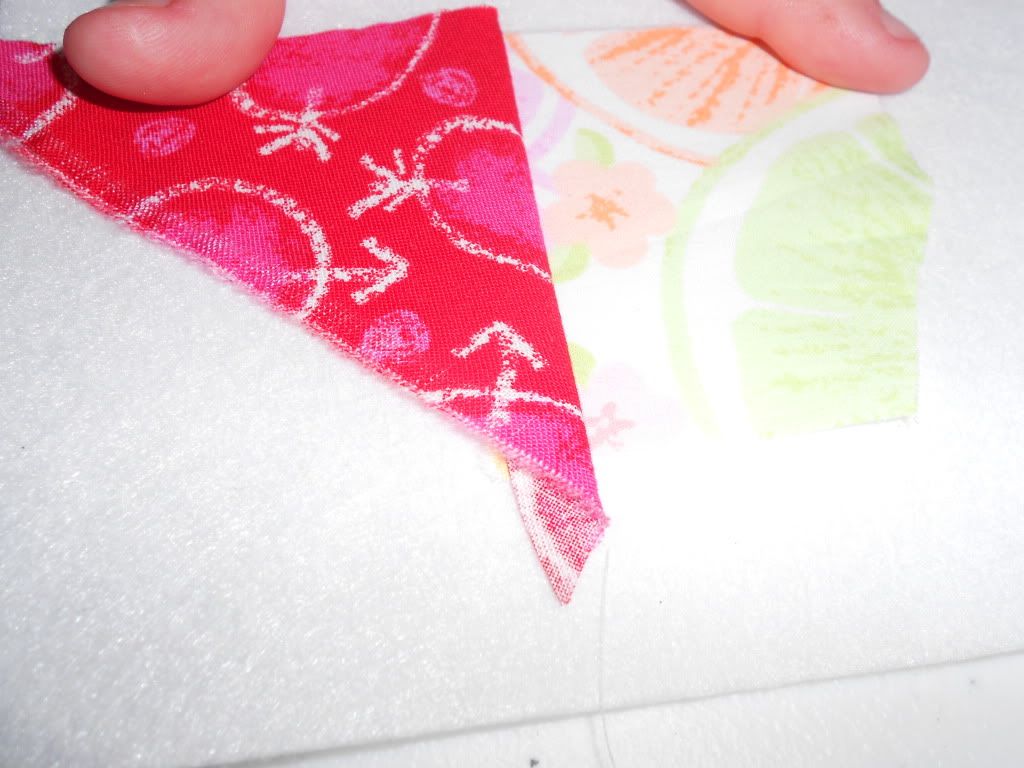
I made 4x6 cards, so to start with, I made my cards 5x7 and trimmed them down later. So first off, cut your Peltex to 5x7 (or about 1" bigger than the finished size you want). Pick out two scraps to start with. I've found that a 3 or 5 sided piece looks best in the end, but you can use a square if you want to keep it simple. Lay one piece right side up on the Peltex with the other right side down on top of it, lining up the edges on one side. Like so:
Sew down the sides that are lined up with a straight stitch. I didn't bother with to back stitch, because it will be stitched over again. Flip the top piece back so it's right side up, then iron it all smooth.
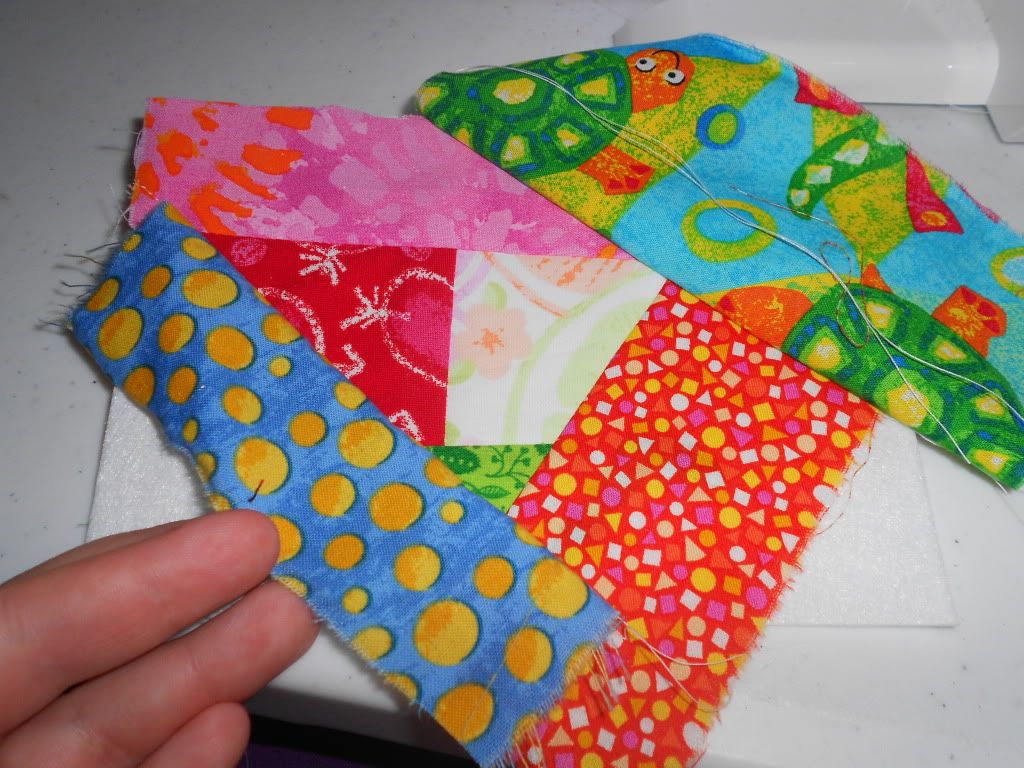
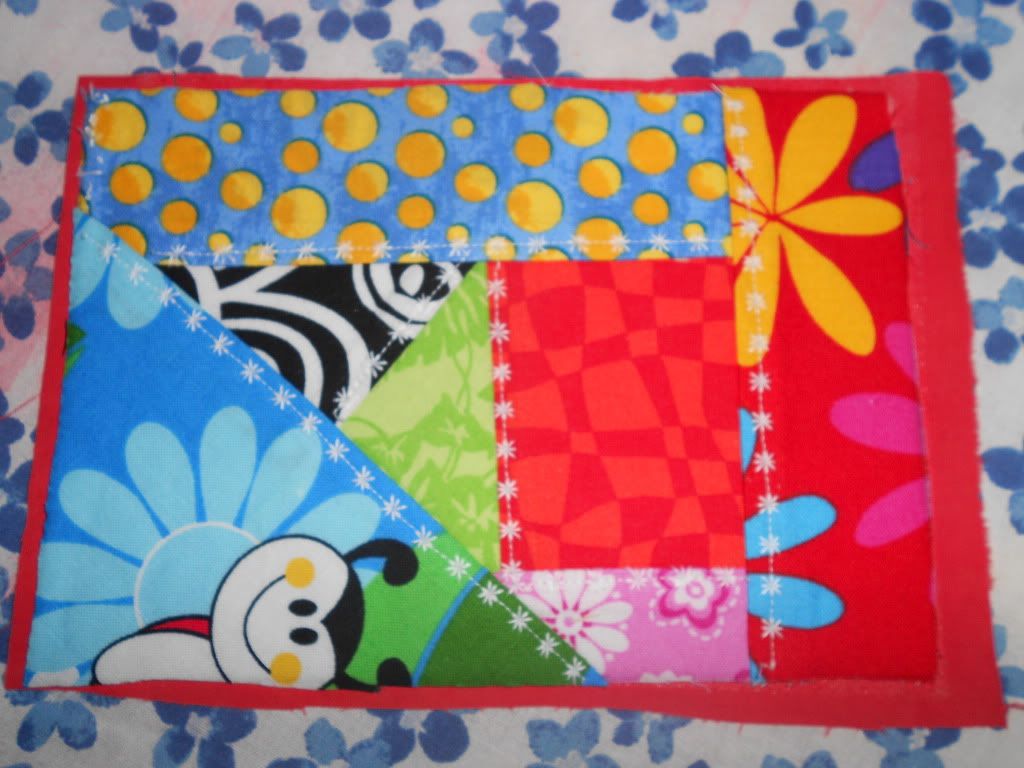
Pick out another scrap piece and lay it face down on another side of your first piece. Sew it down, flip it back right side up and press. Do this all the way around your first piece until all sides of it have been covered. You'll probably need some bigger scraps to go around the second time. Just keep sewing pieces down until you've covered the entire piece of Peltex. You'll end up with lots of overlap, but don't worry about that.
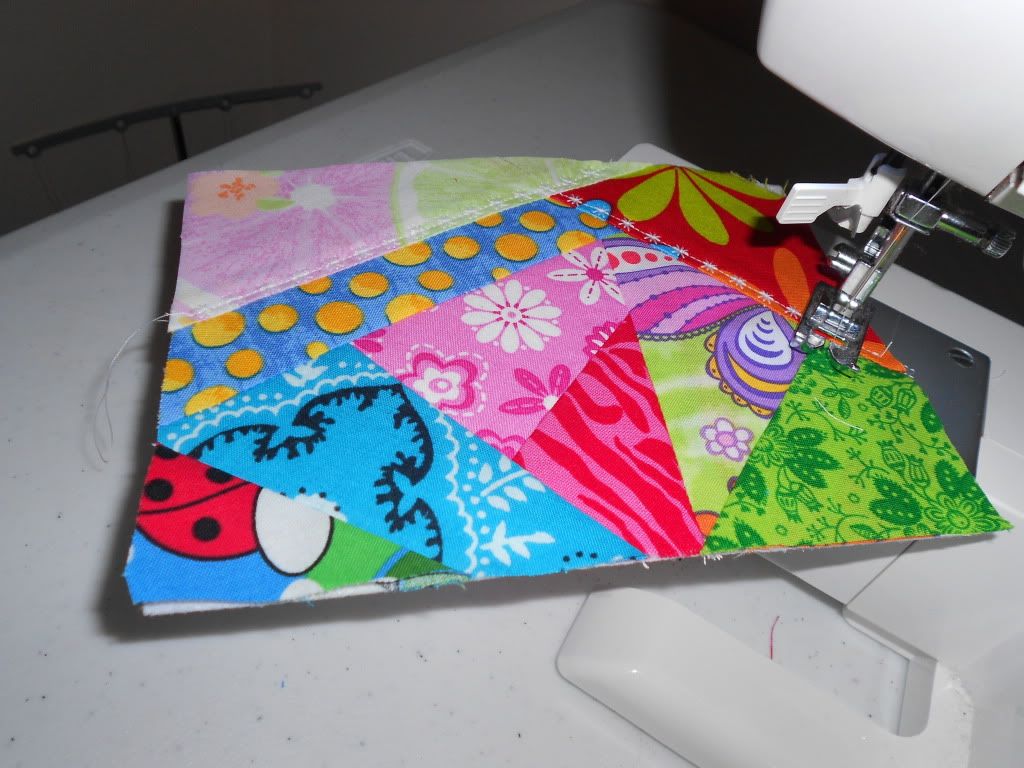
Just make sure all the raw edges are covered. When you've done that, give it one more good press with the iron. Trim off the excess fabric- precision isn't necessary at this point, just chop off the bulk of it. Switch your machine to a decorative stitch, then sew over all the seams you made.
I sew just to the side of the seam, instead of right on top of it.
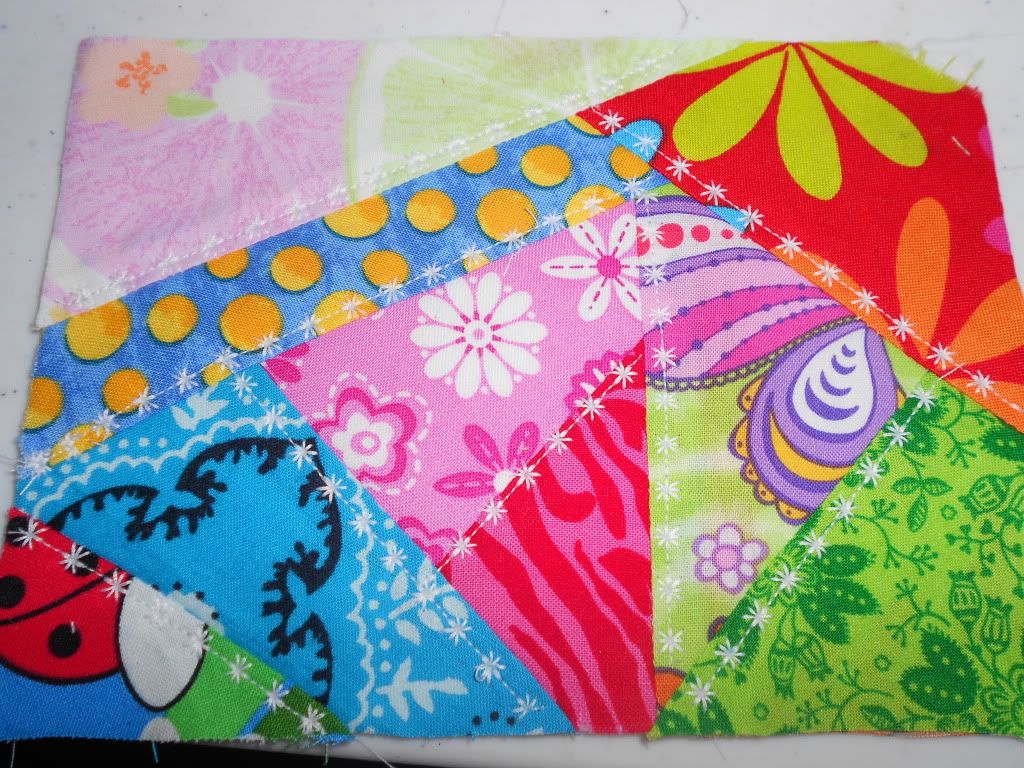
This is after I've stitched along all the seams.Of course I forgot to take a picture of the back at this point, but suffice to say that it is just a mess of threads going everywhere.

Now to attach the backing fabric. You can use anything solid for the back. I had some scraps of red, white, and some of the tan muslin laying around, so I've used all of those. For this one I used excess fabric I had to cut out of the skirt I made from part of a bed sheet. I had LOTS of excess from that, but I'll save that rant for another post.

Take your fusible web and attach it to the backing fabric according to the directions. Cut a piece of the fabric with the fusible web on it roughly the size of your 5x7 card. I just lay my card on top of the backing fabric and cut around it. Attach the backing fabric to the back of the card according to the fusible web instructions. This is what mine looked like after I attached the backing.

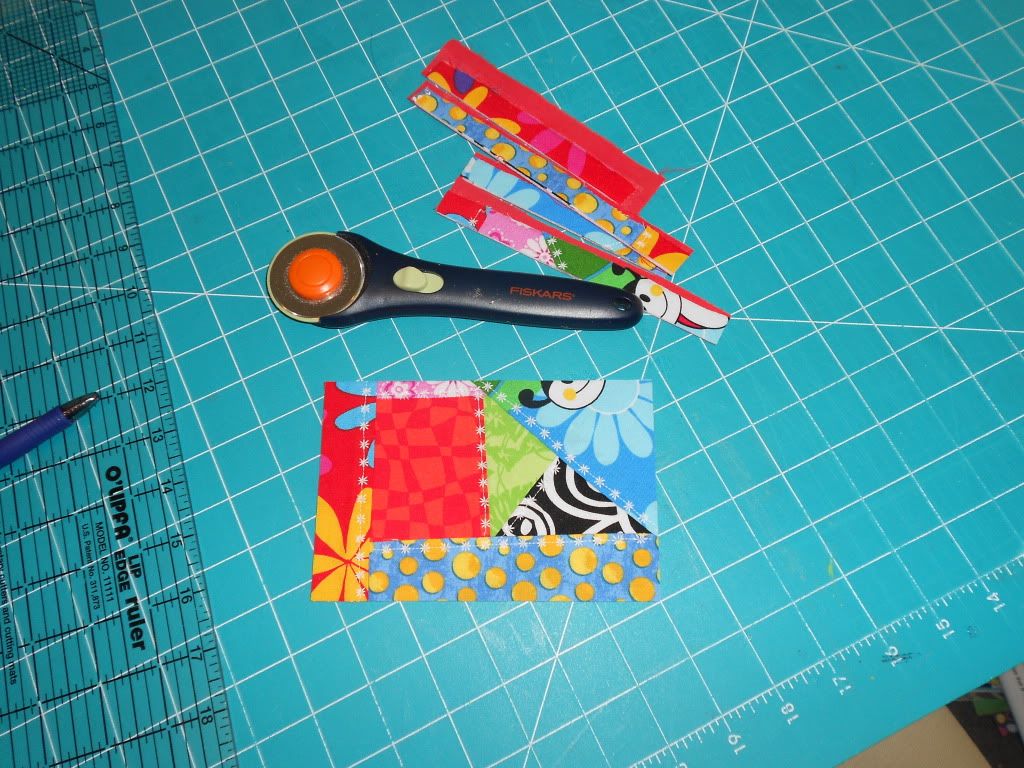
Take it to your cutting mat and trim it down. Since mine was 1" bigger each direction, I trimmed 1/2" off each side.
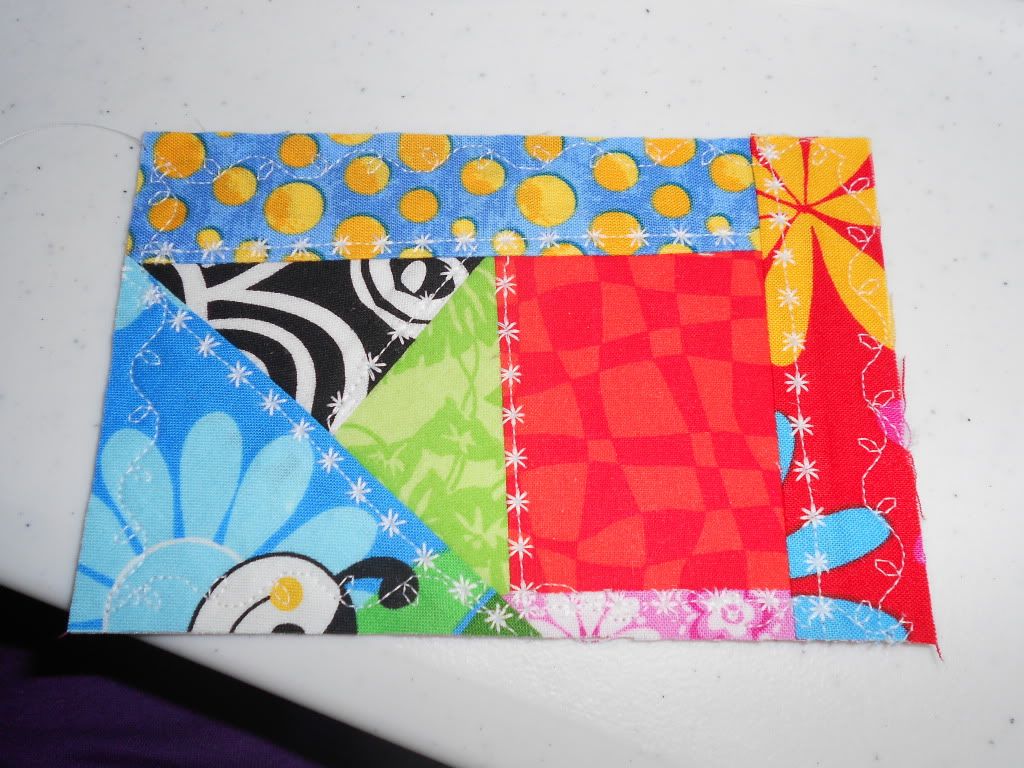
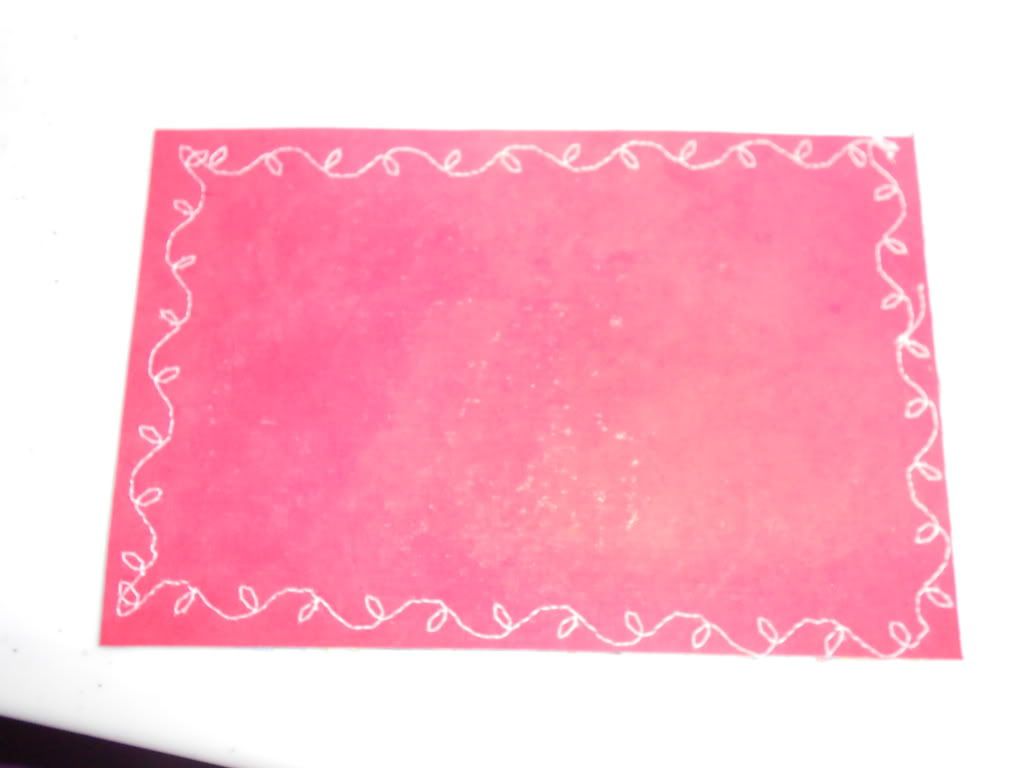
Now you have to finish the edges. You can use whatever stitch you prefer- I have used zig zags right along the edges, straight stitches 1/8" to 1/4" from the edge, but my personal favorite is a decorative stitch. My machine has a star which I am slightly fascinated with. It's how I've finished about 80% of my cards so far. I used a swirly leaf pattern on this one.
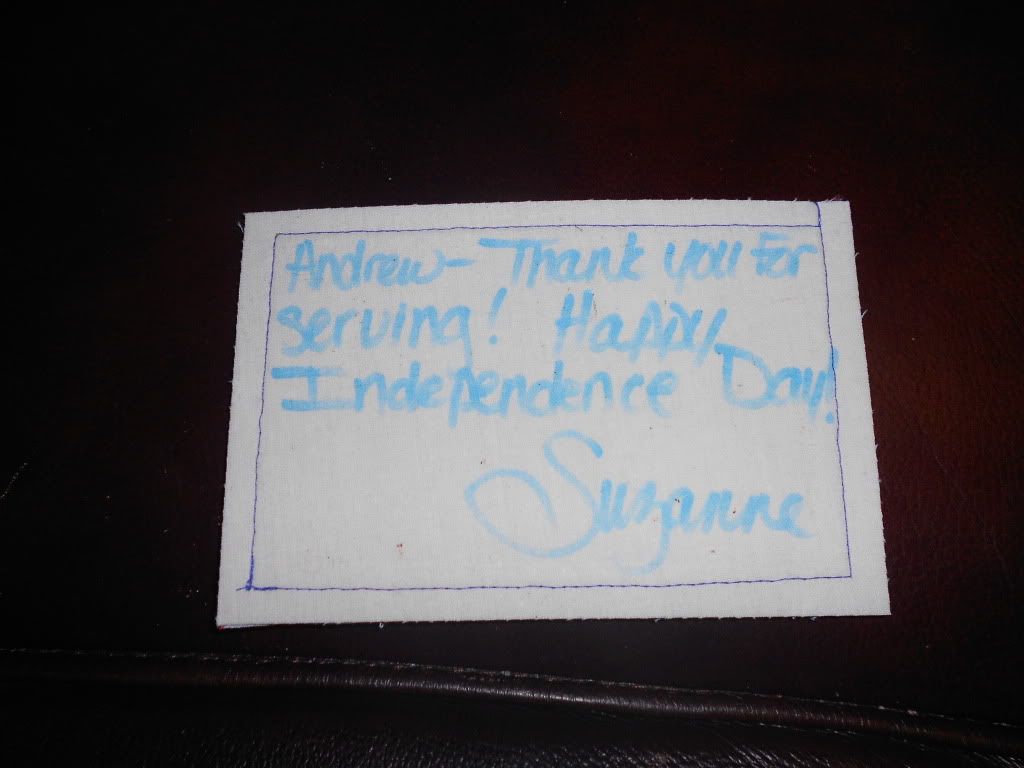
This is as far as I have taken my cards. All of mine will be going in an envelope and mailed with several others, so I didn't need to bother with making them acceptable for the USPS. You can follow the links above to see how those bloggers did it. I just jotted a message on the back with a Crayola fabric marker that I happened to have. Sharpies also work great.
You're all done now! These things are strangely addictive to me. Probably because my attention span for sewing projects is about 5 minutes, and I can almost completely finish one of these in that time. Here's what a finished card looks like from the back.


Friday, March 9, 2012

Quick & easy DIY air freshener

I've been rather lacking on the blog scene, considering that I'm new. Shame on me. A few weeks ago I hit up some estate sales while Mom was in town, and made some awesome scores. I found a trunk and a small dresser for $5 each, and a few nifty old school jars. I've been busy fixing them up, and when I get them all spiffed up, I intend to make a post about them. However, in the mean time, I discovered a nifty way to make an air freshener in about 5 minutes.

Here's what you need:
Purex crystals fabric softener


This is my favorite scent. I love using it for laundry because it smells up my laundry room and kitchen. Yum!
You will also need a canning jar with a two part lid- the ring and seal type, a small square of fabric big enough to cover the top of your jar, and a pair of pinking shears.

I didn't take any pics of the process, but it's beyond easy, so no biggie. Take your jar- it doesn't matter what size. I used a pint jar because that's what I had, but a smaller jar would work just as well. In fact, probably better. Pour in some of the Purex Crystals. I put about an inch in my jar. This is where the smaller jar would work better- you could use a smaller amount and not have the empty space showing in the jar. Trim your fabric piece with pinking shears so it doesn't ravel. Place it over the top of the jar and screw the ring down over the top. Ta-da! All done. If you wanted to use these as a gift (which I intend to do, as part of a DIY gift basket for household goodies) you could put the seal on the jar, then the fabric, then the lid to hold the smell goods in until it gets to the recipient. Even decorate it with a ribbon or a label. Get crazy with it.